Showing posts with label Unit 31 - Development and Techniques of Film and Video Editing. Show all posts
Showing posts with label Unit 31 - Development and Techniques of Film and Video Editing. Show all posts
Thursday, 4 July 2013

Music Video Evaluation
Evaluation For Music Video
My brief for this unit was to “Produce footage and edit to a
standard acceptable to a client” I believe I achieved the brief and I think
this is the best work I have done so far. This is shown through my client
feedback where my client says I did such a good job on this video they want me
to film the bands next video. The style of music video I went for was a live
performance music video which basically documents the band playing at multiple
venues and can also contain what goes on in between venues such as the tour bus
or backstage. The reason why I chose to do a live performance video is because
I have always preferred them to a narrative based video because you get a
behind the scenes glimpse of how the band works and what they look like live if
you have never seen them live before.
Before I started filming I did some planning, the first part
of my planning was watching some live performance music videos and choosing the
best ones that I wanted to take influence from. The videos I analysed were
“Dead Ends” by the band “Heights”, “Fancy Dress” by “Don Broco” and “Hell
Above” by “Pierce The Veil”. I analysed each video multiple times to get a good
knowledge on the typical codes and conventions found in live performance music
videos so that I could ensure my video contains them too.
The next step in my planning was to storyboard. I made story
boards for certain shots that I thought were going to be really important to
the video and that I wanted to get perfect. Shot one of my storyboards is
clearly shown in the video when the bass player is tuning his guitar at the
intro. Whilst planning I also decided that I would do the entire video in black
and white as one of my main influence videos was done the same way, this is
clearly shown through my entire video. The final part to my planning was to
choose locations where I would film. Because it was a live performance video
and I needed footage of the band playing the locations were the different
venues they played at. All together I travelled with the band to four different
places, two venues were local and one was in Leicester, The final location I
filmed them at was a warehouse where they practise. The best footage I took was
from the warehouse. This was because I had plenty of room to move around there
whereas I couldn’t at other gigs due to the crowd. This is shown to be
effective in my video in all close up shots as these were all filmed at the
warehouse.
Production skills
Overall I believe that my production skills were to a good standard
and worked well in this particular unit. My camera work could have been better
focused at the gigs and if I was to do this again I would probably set the
camera to auto focus. I believe that the angles I shot from was good and proved
effective for example the shot when it cuts from a close up of the drummers
pedal to a higher angle of him hitting the drums. How ever, if I were to do
this again I would take another person with me to film and more cameras, this
way I could get more footage at lots of different angles. I was however pleased
with the overall outcome of my camera work and my favourite footage is where I
have filmed the bands equipment out of focus and then slowly bringing them into
focus. I believe that all my footage fits the purpose of a live performance
music video, as it is entirely hand held. This gives the viewer a sense of
being in the crowd. I was dedicated to getting the footage I needed even if it
meant travelling further away to a gig. I was confident with what I wanted to
achieve at a gig and what shots I wanted to get because of good planning.
Before each gig I would make a shot list of what I was going to film and I
would try my hardest at gigs to get all of them. This proved effective as I
ensured I was getting shots from as many angles as I could. This is shown in
the chorus of the video when the editing is faster paced and every shot is from
a different angle. It was difficult at the Leicester gig due to there being
poor lighting on the stage, which meant the majority of shots I took, were in
low key lighting. To resolve this problem I made effective judgements whilst
editing. I looked through all of the footage from that gig and chose the ones I
needed most and I used the “Gamma Correction” tool on premiere to brighten the footage.
By making this effective judgement it meant that I did not loose out on any of
the shots that I needed and were important to my film.
List for improvements
·
Take more people to help me film
·
Take more cameras to cover more angles of the
stage
·
Use tripod
·
Take extra lighting
·
Film more footage of the band back stage, on the
road etc.
·
Film some footage separately along to a click
track.
·
Better focused shots
·
More close ups
·
Get some whip pans (typical convention that adds
effect).
·
More mid shots
·
Get some zoom shots
Editing Skills
As soon as I had all of the footage I needed, I started
editing. The editing process went really well overall, this is because I did a
good amount of planning before filming and I also had a clear idea in my head
for the direction of the music video. After taking influence from my chosen
music videos I knew I wanted to do the entire video in black and white and use
montages. I put these into practise by changing all my footage to black and
white and having a montage sequences throughout my video. If I did this again I
would use more montage so that the videos pace matched the song all the way
through. In my opening sequence, the
bands equipment, tuning up, sound checking etc. is all edited as a slow paced
montage. This is to match the pace of the ambient sound at the start. I was to
do this again I would do quicker cuts towards the end of the opening montage,
this way I could build up to the start of the song and it would have given the
video more energy. It is shown that my influence has been put to good practise
at the start of my video for the opening sequence. I made this more effective by adding some
ambient sounds to then blend in with the ambient guitar at the start of the
song. Another example of how my editing skills have been put to good practise
is when the vocals on the song start. For this I synced the footage with the
song as close as I could. This is made effective through the entire video
except for a small part when the guitarist steps in front of the microphone to
sing. If I were to do this again I would film the guitarist on his own singing
his parts to a click track so that the timing was perfect for all the vocals. I
also used the editing technique of continuity, an example of where I used this
effectively is when the drummer is being filmed from the front of the stage and
then it cuts to a close up of him hitting the drums. I was to go back I would
use a lot more continuity so that the viewer would get to see everything that
the band is playing, it would also have added more pace to the video, as I
would have done quicker cuts.
List for Improvements
·
Quicker cuts, therefore I would need more
footage.
·
More montages
·
Sync vocals footage
·
Use more continuity effectively
·
Quicker paced
Final Product
Overall I feel that my music video has met the goals and the
client’s needs that were set. It does this by appealing to the target audience,
which are the bands fans. It appeals to them because it gives them an insight
into the band live and also at practise. I have done this by filming the band
at practise and gigs and editing it together as a montage. This keeps the video
well paced and also has a good transition between live performance and practise
performance. I feel that my video definitely shows influence from my chosen music
videos for example the video for “Heights” is filmed entirely in black and
white and has a strong use of montage throughout. You can also see where I have
taken influence from this in the opening sequence as it has the bands logo in
white text layered on top of the montage, as does the “Heights” video.
There are some things on my video that I would change such
as the pace of the cuts. If I were to go back I would get loads more footage so
that I had more to work with and I could do quicker cuts. I would also take
more people with me to help film with more cameras, this way I could cover
multiple angles of the stage and also get some close ups. As I had a problem
with lighting at one gig I would ensure that I had some form of lighting with
me just in case this sort of thing happened. The final thing I would change is
I would get more footage of the band messing about or drinking etc. This way
the video not only captures the live performance of the band but what the get
up to backstage, on the road etc.
Tuesday, 4 June 2013
music video codes and conventions
-->
Heights-Dead Ends -->
-->
Music Video Codes and Conventions
For my production work I am making a live performance music
video for a friends band. To get influence for my video I analysed three live
performance music videos from different bands to get a good understanding of
the typical codes and conventions used in them.
Heights-Dead Ends -->
The first video I looked at was from a band called “Heights”
and the song is called “Dead Ends”. The video has a good number of codes and
conventions that make the video as good as it is.
·
The video is all in black and white
·
It starts with a stage crew setting up the
equipment.
·
The band performs a ritual before they go on.
·
Bands logo and song title.
·
A strong use of depth of field.
·
Numerous venues.
·
Shots of the crowd clapping and singing along.
·
The band signing autographs.
·
A lot of focusing is on the singer.
·
Extreme close ups of members playing their
instruments.
·
Timing of the cuts matches the timing of the
song.
-->
Don Broco-Fancy Dress
The second music video I analysed was “Fancy Dress” by the
band “Don Broco”. Again this video uses similar conventions to the last but
this one has more venues shown. This shows how “Don broco” is bigger and gig
more than “Heights”.
·
Montage showing each band member.
·
Multiple locations and venues.
·
Footage of the band messing around backstage.
·
Footage from inside the tour bus.
·
Timing of cuts is perfect with the song.
·
Shots showing the crowds reaction and singing
along.
·
Time lapse of setting up the stage.
·
Close ups of each member.
·
Hand held camera makes you feel like your part
of the crowd.
Pierce the Veil-Hell Above
The third video I analysed was
“Hell Above” by the band “Pierce the Veil”. This is also a live performance
video that uses similar codes and conventions to the others that make it a
perfect example of a good live video. This video uses more footage of the fans
then the others because “Pierce the Veil” are much bigger than the other two
and have a much bigger fan base that they can show in their videos.
·
Fans chanting the bands name.
·
The bands logo used for intro.
·
Shots of the band queuing outside the gigs.
·
Time lapse of the stage being built.
·
Close ups of the band preparing for the gig.
·
Shots of band doing pre gig warm-ups.
·
Close ups of each member playing.
·
Close up of guitars.
·
Footage of band signing autographs.
·
Footage of the band meeting the fans outside the
venue.
·
Majority of shots of the band playing are from a
low angle. Puts the viewer in the audience’s position.
·
Footage of the band on the tour bus.
All
three videos use these codes and conventions on a great level and by doing this
it has ensured that a perfect live video has been made. By capturing footage
from multiple gigs and also footage from backstage or on the tour bus it gives
the viewer an inside look on what touring as a band is like. I have studied all
of these codes and conventions that are typical of live performance music
videos and I will take influence from them in my own production. Because the
band I am using is not big I wont be able to get shots of big crowds so to
overcome this I will take footage of the people at the front from a low angle
to make it look busier. I also want to ensure that I get some good footage of
the band messing about and unloading the equipment out of their cars as this sort
of footage works well and adds a fun side to the video away from them playing. I
will make sure that I go to more than one gig so that I can get more footage of
them playing the chosen song. Different gigs also mean that the band wont be
wearing the same clothes in every shot as well which makes it look like they
are on tour rather than doing a one off gig.
Tuesday, 28 May 2013
Tuesday, 15 January 2013
Aperture
Aperture
In this shot we were doing some innovative filming techniques like the new wave directors would. you can see that the back ground in the shot is out of focus. This is because we were filming at around f/14 which creates a shallow depth of field.
This is the same shot but done again. This time we changed the aperture to f/22, which creates a bigger depth of field so the background is in focus swell as the fore ground. This made the shot look a lot better. I think it is a really nice new wave shot as well because of the innovative camera movement so its as if you are walking with me. I also break the fourth wall in this shot which has influence from the French New wave film 'Breathless' when it is highlighted at the end that the character is breaking the fourth wall.
In this shot we were doing some innovative filming techniques like the new wave directors would. you can see that the back ground in the shot is out of focus. This is because we were filming at around f/14 which creates a shallow depth of field.
This is the same shot but done again. This time we changed the aperture to f/22, which creates a bigger depth of field so the background is in focus swell as the fore ground. This made the shot look a lot better. I think it is a really nice new wave shot as well because of the innovative camera movement so its as if you are walking with me. I also break the fourth wall in this shot which has influence from the French New wave film 'Breathless' when it is highlighted at the end that the character is breaking the fourth wall.
Tuesday, 20 November 2012
Oxford trip
Recorded meeting 2
We held another meeting for the Oxford trip as it was a day when we needed to be really organised. In the meeting we discussed what locations we would visit, what shots we would take and how much time we would allow for each location shoot.
Recorded Meeting 1
When we started to go out and film on location we realised that we needed to be more organised with what were filming, where we were filming and different shot types that we were doing. we realised that the best way to get around this was to have meetings and record them. this way we could listen back over the recordings to see what was said.
Shutter Speed
Shutter speed
In this footage we were trying out some innovative camera movements so that we had shots in a new wave style. In this shot we were driving around and filming out of the window. Unfortunatley this shot did not look good as it is really blurry. This is because the shutter speed was not quick enough and was set at around 1/50.
This is another innovative camera movement in the car but this one is much clearer with no blurs because we made the shutter speed quicker at around 1/500
In this footage we were trying out some innovative camera movements so that we had shots in a new wave style. In this shot we were driving around and filming out of the window. Unfortunatley this shot did not look good as it is really blurry. This is because the shutter speed was not quick enough and was set at around 1/50.
This is another innovative camera movement in the car but this one is much clearer with no blurs because we made the shutter speed quicker at around 1/500
Evaluation
Overall I think the course so far has been successful. At the start of the course we started our research for our contextual work. The research went really well as I had a lot of books to look through which i got a lot of information from and we also took a trip to Coventry Uni Library . the trip to the library really help0ed as there was books there that i may not have been able to get my hands on so i took the opportunity to photo copy every bit of information i could. Once i had finished my research I made a start on the contextual. I think that my contextual work went quite good as I have never been very good at writing essays but I feel that my writing skills are now at a higher level. it also helped having plenty of research to write about. I also learnt How to use Harvard referencing which i thought was going to be really hard but turned out to be not that difficult.
The filming in the course was really enjoyable. I really liked going out and filming on location and learning about different camera techniques. When we first went out to film on location every one was a bit nervous about it as we were worried about people looking at us which, in Nuneaton we did get. This changed when we went to Oxford to film as it is a popular destination for tourists so we just looked like any other group of tourists. We used Nuneaton to film more "gritty" scenes or locations especially at Fife Street Park as there was vandalism on the kids playground and used condoms on the floor. This all added to the gritty feel and we managed to get some really good footage. Oxford was the complete opposite and thats why we went to film there. everything was really picturesque there and we got some really good footage from there. Before we went to Oxford we made a plan of what we were going to film and where. we decided on three main locations which were The Turf Tavern, Jericoh Street and an old record shop. We managed to get two out of the three as we didn't have time to make it to Jericoh Street as we were stopping on the way to different locations to film at other good locations such as an old fashioned sweet shop. The sweet shop was a really good place to film and we got some of our best footage filmed in there. We also spent quite bit of time in there because we were getting really good footage and we had permission to film in there for along as we wanted to. Another really good location we filmed was in an old record shop/coffee shop as the owners were really nice and said we could film as much as we wanted. In the record shop we got some really good cutaways and we got to try using the Boom mic. The boom mic did not go successfully as will did not realise that he was holding it next to a speaker, but we got to practise with it.
I feel that my "Blogging" could have been better as i should have put more videos of footage and i should have went into more detail when discussing various things. The reason why i didn't spend as much time on my blog as other work is because I'm not a strong essay writer, i spent most of my time worrying about that and writing draft after draft trying to get my grade up as much as possible rather than putting more effort into the blog.
The editing of all the footage was my favourite part of the unit as it finally gave me the chance to put my own creative feel to all of the footage we filmed together. at first I wasn't going to have a narrative or theme to my film but when i got more into the editing i realised that i was creating a theme with out realising it. The theme is of a journey to different locations and i have shown this through how i kept cutting back to a shot of a car wing mirror whilst the car is moving to represent the travelling part. Then i have used different shots of different locations along with different cut away shots. Because i have taken influence from New Wave cinema i have put innovative camera movements in my film to show this. We had to put music over the top of our film and were told that a sensible choice would be Post-Rock as this starts off slow and builds up. The music I chose was by a band called Peace and the song is called 1998 and it works really well with my film as different sounds at the start of the song fit the timing of my jump cuts that i put in.
Overall I think the course so far has been successful. At the start of the course we started our research for our contextual work. The research went really well as I had a lot of books to look through which i got a lot of information from and we also took a trip to Coventry Uni Library . the trip to the library really help0ed as there was books there that i may not have been able to get my hands on so i took the opportunity to photo copy every bit of information i could. Once i had finished my research I made a start on the contextual. I think that my contextual work went quite good as I have never been very good at writing essays but I feel that my writing skills are now at a higher level. it also helped having plenty of research to write about. I also learnt How to use Harvard referencing which i thought was going to be really hard but turned out to be not that difficult.
The filming in the course was really enjoyable. I really liked going out and filming on location and learning about different camera techniques. When we first went out to film on location every one was a bit nervous about it as we were worried about people looking at us which, in Nuneaton we did get. This changed when we went to Oxford to film as it is a popular destination for tourists so we just looked like any other group of tourists. We used Nuneaton to film more "gritty" scenes or locations especially at Fife Street Park as there was vandalism on the kids playground and used condoms on the floor. This all added to the gritty feel and we managed to get some really good footage. Oxford was the complete opposite and thats why we went to film there. everything was really picturesque there and we got some really good footage from there. Before we went to Oxford we made a plan of what we were going to film and where. we decided on three main locations which were The Turf Tavern, Jericoh Street and an old record shop. We managed to get two out of the three as we didn't have time to make it to Jericoh Street as we were stopping on the way to different locations to film at other good locations such as an old fashioned sweet shop. The sweet shop was a really good place to film and we got some of our best footage filmed in there. We also spent quite bit of time in there because we were getting really good footage and we had permission to film in there for along as we wanted to. Another really good location we filmed was in an old record shop/coffee shop as the owners were really nice and said we could film as much as we wanted. In the record shop we got some really good cutaways and we got to try using the Boom mic. The boom mic did not go successfully as will did not realise that he was holding it next to a speaker, but we got to practise with it.
I feel that my "Blogging" could have been better as i should have put more videos of footage and i should have went into more detail when discussing various things. The reason why i didn't spend as much time on my blog as other work is because I'm not a strong essay writer, i spent most of my time worrying about that and writing draft after draft trying to get my grade up as much as possible rather than putting more effort into the blog.
The editing of all the footage was my favourite part of the unit as it finally gave me the chance to put my own creative feel to all of the footage we filmed together. at first I wasn't going to have a narrative or theme to my film but when i got more into the editing i realised that i was creating a theme with out realising it. The theme is of a journey to different locations and i have shown this through how i kept cutting back to a shot of a car wing mirror whilst the car is moving to represent the travelling part. Then i have used different shots of different locations along with different cut away shots. Because i have taken influence from New Wave cinema i have put innovative camera movements in my film to show this. We had to put music over the top of our film and were told that a sensible choice would be Post-Rock as this starts off slow and builds up. The music I chose was by a band called Peace and the song is called 1998 and it works really well with my film as different sounds at the start of the song fit the timing of my jump cuts that i put in.
Wednesday, 14 November 2012
Editing for lighting
EDITING


At the moment i am currently editing my montage of shot types. It is so far my favourite thing that i have done on the course. The soft ware i am using is Adobe Premier Pro on a mac and is really good for editing. The film has to be between 3 and 5 minutes long and has to contain a variety of different shots and filming techniques we tried out. Whilst editing i tried to create a theme and it is the theme of traveling to places. for example between all the shots i have edited it to keep cutting back to an innovative shot of the wing mirror whilst we are moving in the car to show moving to different places or scenes. Depending on the outcome of the final product i don't know whether or not i will keep this theme. You can also create meaning through the use of montage. I have tried to do this by cutting back to the shot of the car wing mirror, this combined with footage of different places gives the meaning of traveling.
Tuesday, 13 November 2012
This is more footage from the low key shoot. the studio was pitch black and our key light source was a phone. in this shot we used a creepy looking doll. This worked really well in the low key light because it gives the doll a much more scary feel to it. the equipment we used for this footage was a cannon 5d, a tripod and the phone for key light.l we were shooting on aperture f/22 which worked really well. We used the iPhone as our key light because we took influence from French New wave cinema by using innovative light sources due to budgeting.
Thursday, 8 November 2012

White Balance

.
This is an example of some footage we had problems with white balance on. as you can see the whole shot is effected by the grainy blue colour. We were filming on aperture f/22 but we had not adjusted the ISO or frame rate. this is what caused this grainy blue colour. once we had realised we increased the ISO.
Prep For Oxford Shoot
Prep For Oxford Shoot

This is an example of pre Oxford filming day prep. We all got together and discussed what equipment we would need for the day. Sammy then sent an email around confirming this just incase we needed anything else or forgotten something. The whole day went really well and to schedule and this was down to planning.
Lighting
We filmed this footage in the photography studio. It is an example of using innovative light sources. for this shot we used two light sources one was a light on an iPhone and one was a small barn door light. This is one of my favorite shots we did because it creates a really nice low key light and the colours of the table cloth reflects the light really well. the barn door light was located towards the bottom right corner of the table to get a highly lit area of the table. we then had the iPhone located above the bowl towards the top left corner. The camera was at a high vantage point. This shots influenced by the "Kuloshev effect"and it is when you create meaning or emotion of a character through the use of editing. you do this by having a shot of the person then cutting away to a shot of food in this case. By doing this it tells the viewer that the character is hungry.
Aperture
Aperture

This is a diagram showing how to use aperture and what each one does. For most of our filming we shot on aperture f/22 as it lets less light and creates a deep depth of field.
As you can see in this shot, the actor is in focus but the background is out of focus. This is because the aperture would have been set at around f14 which creates a shallow depth of field. If i was to go back and do this shot again I would set the aperture to f22 to create a larger depth of field. we were using a dolly in this shot therefore next time i would also increase the shutter speed slightly. I would also make sure that the surface we were using the dolly on was smooth as the slightest bump on the ground could cause the shot to look really shaky.
New Wave
This shot was supposed to be influenced by new wave as we wanted to get a nice zoom out using the dolly to show how he is "trapped" by showing him behind the cage. Unfortunatley the shot did not work out as the surface was so un even.
Health & Safety
When filming this piece of footage we had to take some risks into consideration. One of which for this shot was that nothing was behind the dolly operator to cause them to trip up as they are walking backwards.
Recording Sound With an External Microphone


Sound
This footage we filmed in an old record shop. We basically wanted an interview with a worker about the music scene in Oxford so we could use the boom mic. As you can hear we had some problems with the boom mic as there was a speaker right next to where we had it positioned. The camera position and framing look really good and like a documentary style its just the sound that lets it down. For this shot we had the aperture set at f/8 so we had the ISO set at 400 and the shutter speed set at 1/250. We put the ISO up because we wanted to make the most out of the small amount of light that was in front of him. All of these made the shot look really nice and documentary style. The equipment we used in this was a Canon 500, tripod and the boom mic. Looking back on this shot if i could do it again I would make sure that we scan the room for anything that could damage the sound on the boom mic. This mistake with the boom mic led me to notice that in the American new wave film Easy Rider that I've researched for my contextual study, the opening scene is the two protagonists taking part in a drug deal but you can't hear anything they are saying because it has been smothered with the sound of aeroplanes flying over them. Seeing has made me realise i can still use the footage as a new wave influence.
Lighting
We chose to film in the window of the shop because we thought it would look good having the street behind him, which it did but we did not consider him being poorly lit. Looking back if i could have done this shoot again i would have ensured that we used the reflector to reflect light from the window onto the man so that he was evenly lit.
Health & Safety
For this shoot we were in a small record shop so we had to take a few risks into consideration. We had to make sure all bags and equipment we weren't using were stored out the way of any aisles so it weren't abstracting anyone walking. we also had to make sure the tripod wasn't in the way of any walking space so that people wouldn't trip over it. Every one had to be aware of the wires from the boom mic also.
Thursday, 25 October 2012
Camera: Oxford
These are two pieces of footage which we shot in Oxford. The first is an establishing shot where we used the panning technique. we chose this location because it is on Oxfords High street and the amount of different coloured buildings look really good for a shot with a high contrast of colour. for this shot we were filming in aperture f/22.5, the shutter speed was set at 1/500, ISO was 1600 and white balance was at 8000k. I think this shot works really well as an establishing shot as it captures a lot of different colours from the painted buildings.
The second piece of footage is an over the shoulder shot. It was my idea to get this shot whilst walking past the graffiti as i thought it would give a lot of colour to the shot which it did. I also think this shot works really well because its hand held camera work as well which gives a feeling of being followed which works really well. for this shot we were using aperture f22, shutter speed was 1/500, ISO was 3200 and white balance was 8000k.
Wednesday, 24 October 2012
Production techniques


Yesterday we went to Oxford to do some filming. Our main focus was to get some establishing shots, shots with high colour contrast, cutaways and getting some interviews using the boom mic. The day was successful and we got some of everything done. I think the shots that worked best were the establishing shots we did on the high street because its one nice fluid panning shot which can be used to set the scene nicely.
Thursday, 18 October 2012
Kuleshov
Lev Kuleshov is a Russian filmmaker who edited together a short film where a shot of an expressionless face was matched with various other shots such as a plate of soup, a girl in a coffin and a woman on a divan. The audiences believed that each time the face expression would change and they praised the subtle acting. The effect was that effective the audience said they were deeply moved by how sorrowful the actor looked after the image of the dead child. The audience was not aware that the same shot of the actor's face was re-used, and the effect is created entirely by its superimposition with other images to express how the character is feeling.
Kuleshov used the experiment to indicate the usefulness and effectiveness of film editing. The implication is that viewers brought their own emotional reactions to this sequence of images, and then moreover attributed those reactions to the actor, investing his impassive face with their own feelings. Kuleshov believed this, along with montage, had to be the basis of cinema as an independent art form.
The effect has also been studied and used by famous director Alfred Hitchcock. An example of when he used this is explained in the famous "Definition of Happiness" interview, where he explains in detail many types of editing. The final one which he calls "pure editing", is explained visually using the Kuleshov effect. In the first version, Hitchcock is squinting, and the audience sees footage of a woman with a baby. The screen then returns to Hitchcock's face, now smiling. In effect, he is a kind old man. In the second example, the woman and baby are replaced with a woman in a bikini, to which Hitchcock exclaims, "Now look, he has become the dirty old man."
Kuleshov used the experiment to indicate the usefulness and effectiveness of film editing. The implication is that viewers brought their own emotional reactions to this sequence of images, and then moreover attributed those reactions to the actor, investing his impassive face with their own feelings. Kuleshov believed this, along with montage, had to be the basis of cinema as an independent art form.
The effect has also been studied and used by famous director Alfred Hitchcock. An example of when he used this is explained in the famous "Definition of Happiness" interview, where he explains in detail many types of editing. The final one which he calls "pure editing", is explained visually using the Kuleshov effect. In the first version, Hitchcock is squinting, and the audience sees footage of a woman with a baby. The screen then returns to Hitchcock's face, now smiling. In effect, he is a kind old man. In the second example, the woman and baby are replaced with a woman in a bikini, to which Hitchcock exclaims, "Now look, he has become the dirty old man."
Lighting
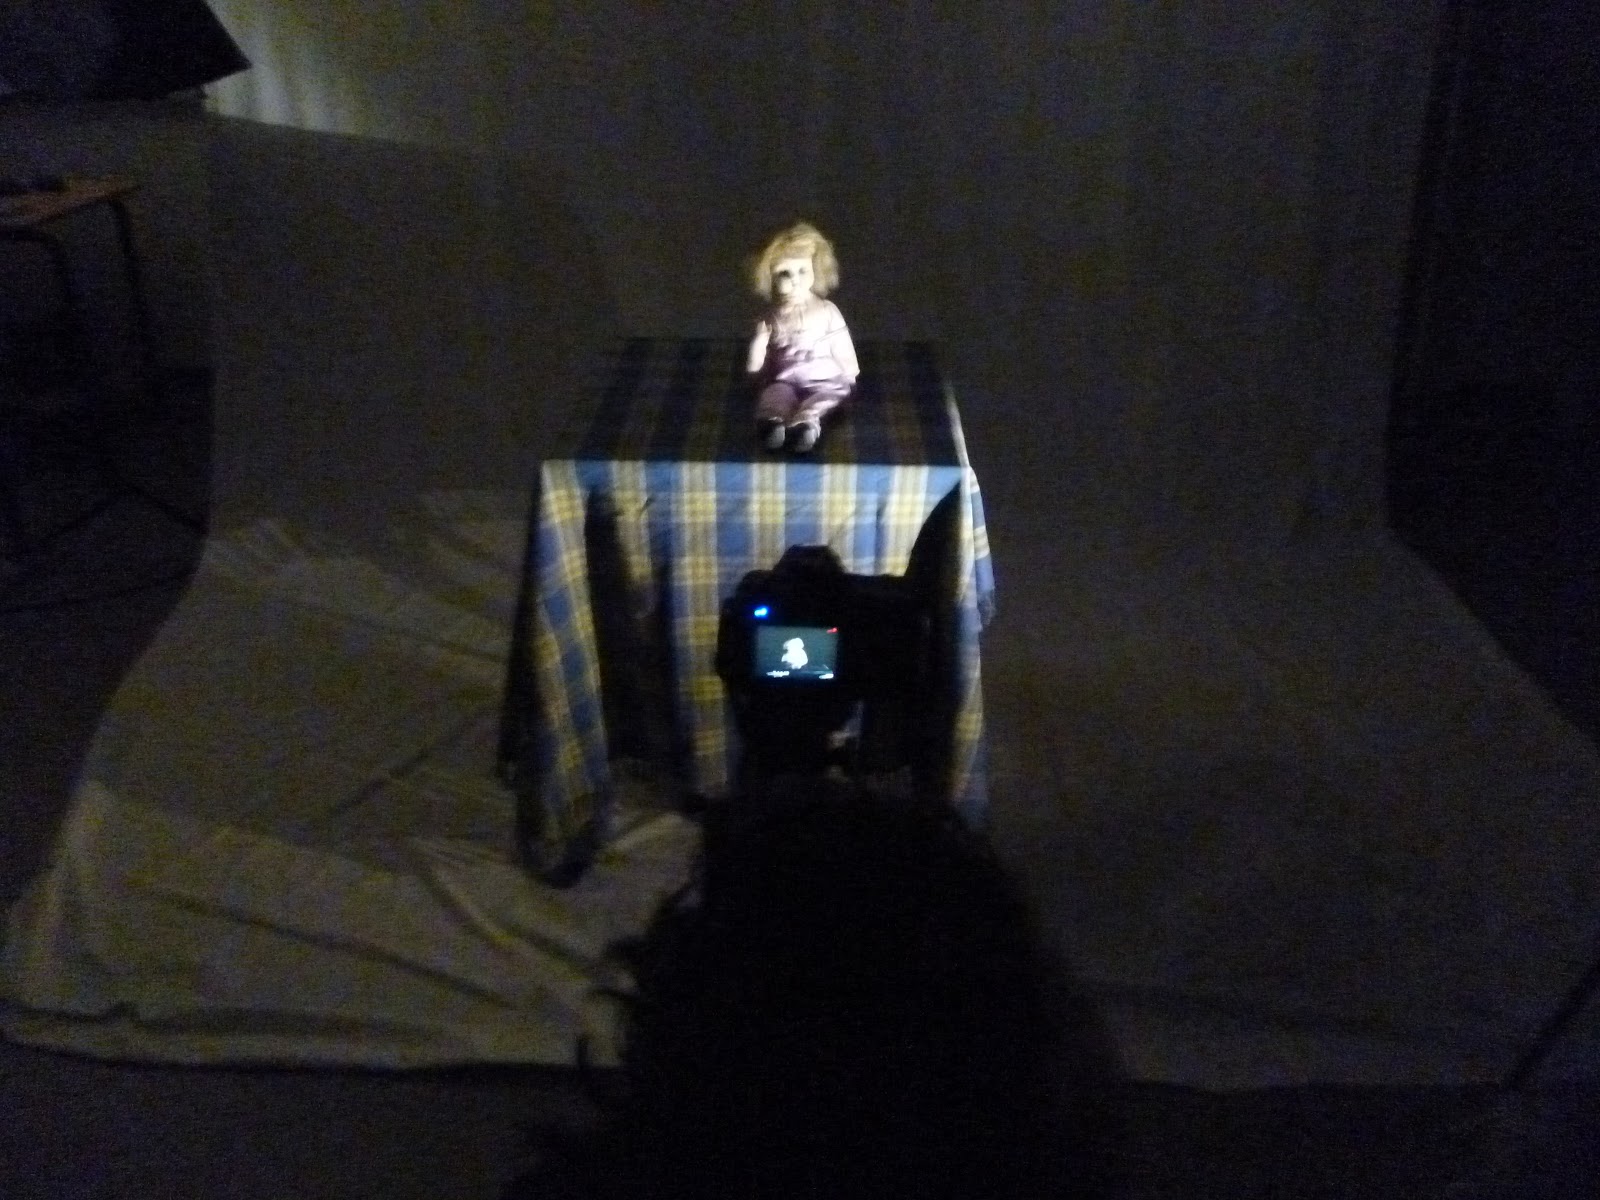


Here are some more photos from the low key lighting shoot. Low key lighting is used to make an object or person look either mysterious or dangerous. For low key lighting you only use one light source. Our light source was an iPhone light. in these photos we were trying out lighting up different props such as a skeleton and a creepy looking doll. The low key lighting worked really well on both of these especially the doll.
Subscribe to:
Posts (Atom)